Showing posts with label Starfish. Show all posts

August 31, 2012

Technique #13: Stamping on Paper Napkins

0

You can stamp on pretty paper napkins and use them as a background for a card, make them into tags, bookmarks, etc...or a decorative wall hanging, like the project from the previous post...

How-To:
1. Peel off the white layers of the decorative napkin.

 2. Glue the decorative napkin to a piece of white cardstock and trim it to size.
 3. Ink and stamp the Starfish Border several times.
 4. Punch the Corners and the edges of a 8.5" x 8.5" piece of cardstock.
 5. Heat emboss the edges of the cardstock with platinum UTEE (see tutorial here).
6. Adhere the napkin panel onto the embossed cardstock.

7. Attach ribbon with staples, so you can hang it!

August 29, 2012

Project #13: By the Sea Wall Decor

0

Supplies: 
1. Stamp:
PO-B49 Starfish Border

2. Ink Pads (Imagine Crafts):
VersaMagic (Turquoise Gem, Ocean Depth and Aegean Blue)
VersaMark

3. Others:
Decorative Napkin
Cardstock
Glue Stick
Platinum Ultra Thick Embossing Enamel (Ranger)
Decorative Border Punch and Corner Punch (Martha Stewart)
Stapler
Ribbon

How-To coming in the next post...

July 31, 2012

July 25, 2012

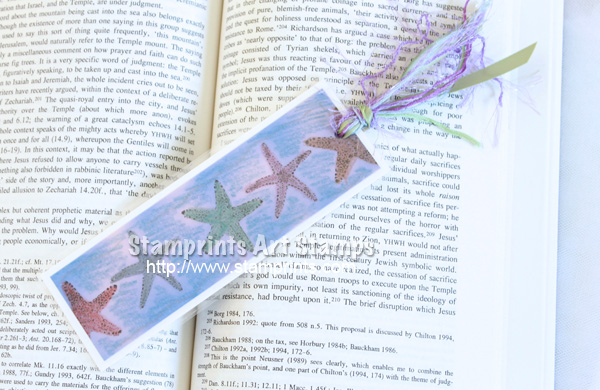
Project #12: Stamped Bookmark

0


Supplies:
1. Stamps:
PO-B46 Starfish Small
PO-B48 Starfish 2

2. Ink Pad:
Memento Tuxedo Black (Imagine Crafts)

3. Others:
White and Blue Cardstock
Metallic Crayons (Faber Castell)
Ribbon
Fibers
Laminating Machine and pocket (Purple Cows)
Corner Punch
Hole Punch

How-to:

1. Stamp the Starfish in Black on the blue cardstock.

2. Color the images and background with metallic crayons.

3. Layer panel on white cardstock.

Trim and place laminating pocket to size and run the bookmark through the laminating machine.

Round the corners and punch a hole for the ribbon/fibers.

Add coordinating ribbon and fibers.

4. Not sure if you can see it, but the hot laminating machine will melt the crayon. The lighter the color, the better! Then you'll be able to see the stamped image better.

And I actually used the heat embossing gun before I laminated the bookmark...that's why I got that lavender color around the starfish ('cause I "burned" the paper).

June 21, 2010

Technique #12: Two-Tone Stamping

0


Stamps: PO-B46 Starfish Small and PO-B48 Starfish 2

This technique gives your stamping images more depth...all you need is two ink pads of the same color, but different shades (a lighter and a darker shade).

With a stamp image of your choice, ink the stamp with the lighter color first. We used VersaMagic Aegean Blue for the sample above.
With the darker ink (
VersaMagic Ocean Depth), ink only the edges of the image.
Then, stamp on cardstock and check out the results!

You can also use markers instead of ink pads!

June 08, 2010