December 12, 2012

December 03, 2012

November 16, 2012

Tip #16: Coloring Images with Walnut Inks

0

This Walnut Ink (in Eucalyptus) come as a spray, but you can use it with a sponge dauber (or any art/ craft, even cosmetic sponges) to color images.

You'll need a stamp (LS-B41 Maple Leaf), an ink pad (Memento Rich Cocoa), Walnut Ink (Eucalyptus) and a sponge dauber.

1. First, stamp your image(s) and let dry. Then, spray a small amount of Walnut Ink onto your craft sheet (if you don't have one, on a plastic bag or plastic table cloth)...I added a little bit of water because I wanted a more diluted color

2. Pick up the solution with the sponge dauber
3. Sponge the stamped images
4. For some shading, just sponge more ink onto parts of the image
Here's a sample card using the panel above.

November 12, 2012

October 29, 2012

Tip #15: Coloring Images (Stippling)

0

Here's a tip on how to color a stamped image using stipple brushes...
Supplies:
1. Stamp:
LS-B38 Pumpkin

2. Ink Pads:
Brilliance Dew Drops Pearlescent Ivy, Pearlescent Rust and Lightning Black

3. Others:
Stipple Brushes

How-To:
1. Load stencil brush with ink by tapping it on the ink pad
 2. Tap excess off on a scrap piece of paper
 3. Color the stamped image 
 And here's a card idea:
(Sentiment Stamp: BasicGrey Mini Clear Stamp Sets)

October 25, 2012

Technique #15: Stamping on Plastic

0

 Supplies:
1. Stamps:
BasicGrey Mini Clear Stamp Sets

2. Ink Pads:
Brilliance Dew Drops Pearlescent Purple and Pearlescent Poppy

3. Others:
Slides
Photos printed and trimmed to fit the slides
Magnets


How-to:
1. Using Brilliance (or StazOn) ink pads, stamp the image of your choice on slides. Let dry.

 2. Insert photos
 3. Add magnets to the back...and voila!

October 23, 2012

October 10, 2012

September 24, 2012

Tip #14: Coloring Images with Craft Chalks

0

Chalks are an easy medium to color stamped images!
You can either:
A. Rub the colors on the cardstock with your fingers or...
B. If you don't want to get messy, use a cotton swab to dab the colors.
Supplies:
1. Stamps:
LS-B40 Maple Leaf Small
LS-B41 Maple Leaf

2. Ink Pads:
Dye Inks in Orange and Red 

3. Others:
Cardstock
Ribbon
Hole Punch
Chalk (Hampton Art)
Spray Sealant (optional - if you want to preserve the colors)

September 17, 2012

Technique #14: Stamping on Dryer Sheets

0

Used dryer sheets can be used as card backgrounds or projects' embellishments!

As a background, as seen in the Card of the Month:
1. Tear it to the desired size.
2. Stamp on it several times.
3. Turn it around and rub a dye ink pad (purple) for some color. Let dry. And use it on your card or other projects.

And as embellishments...this is how the flowers from the previous post were made:

1. Rub dye ink pads on the dryer sheets.
 2. Stamp on it (clear stamp from Fancy Pants Designs Bella Brush). Let dry.
 3. Run the sheets (I stacked  8 sheets here...) through a die cut machine (Cuttlebug, using die cut from Sizzix - Flowers#2). Or just cut it by hand, with the help of templates. 
 4. Assemble your flower embellishment (some of the petals from this flower were not stamped).
 5. Add a brad to the center (you don't even need a hole punch...just poke it through the dryer sheets).
6. Use them in your projects!
(background stamp from Fancy Pants Designs Bella Brush)

Other ways to dye the dryer sheets:
  • Dilute dye ink in a container with water and dip the sheets in
  • Spray ready-made ink sprays directly on the sheets
  • Drop dye inks on the sheets and spray with water
  • Use acrylic paints

September 10, 2012

Project #14: Dryer Sheet Flowers

0

Make these flower embellishments from used dryer sheets and use them on your projects!
Supplies:
1. Stamps:
Script clear stamp (Fancy Pants Designs Bella Brush)

2. Ink Pads
Memento Tuxedo Black
Dye Ink in colors of your choice

3. Others:
used Dryer Sheets
Brads
Die-Cut and a die-cut Machine (optional) - you can also hand cut!

Tutorial coming soon!

September 03, 2012

Card of the Month: Fall Flowers Thanks Card

0

Happy Labor Day!!!


Supplies:
1. Stamps:
LS-B36-Leaves
LS-B37-Bold Leaves
also available in a set (Leaves & Branches Set)
BasicGrey

2. Ink Pads:
Dye Ink Pads in Purple, Orange and Red

3. Others:
Kraft Cardstock
used Dryer Sheet 
Foam Tape
Ribbon
Border Punch (EK Success)
Glitter Glue (optional-for flower centers and sentiment border)

August 31, 2012

Technique #13: Stamping on Paper Napkins

0

You can stamp on pretty paper napkins and use them as a background for a card, make them into tags, bookmarks, etc...or a decorative wall hanging, like the project from the previous post...

How-To:
1. Peel off the white layers of the decorative napkin.

 2. Glue the decorative napkin to a piece of white cardstock and trim it to size.
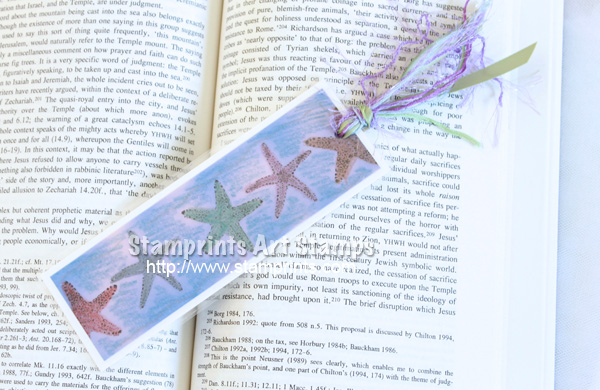
 3. Ink and stamp the Starfish Border several times.
 4. Punch the Corners and the edges of a 8.5" x 8.5" piece of cardstock.
 5. Heat emboss the edges of the cardstock with platinum UTEE (see tutorial here).
6. Adhere the napkin panel onto the embossed cardstock.

7. Attach ribbon with staples, so you can hang it!

August 29, 2012

Project #13: By the Sea Wall Decor

0

Supplies: 
1. Stamp:
PO-B49 Starfish Border

2. Ink Pads (Imagine Crafts):
VersaMagic (Turquoise Gem, Ocean Depth and Aegean Blue)
VersaMark

3. Others:
Decorative Napkin
Cardstock
Glue Stick
Platinum Ultra Thick Embossing Enamel (Ranger)
Decorative Border Punch and Corner Punch (Martha Stewart)
Stapler
Ribbon

How-To coming in the next post...

August 08, 2012

July 31, 2012

July 25, 2012

Project #12: Stamped Bookmark

0


Supplies:
1. Stamps:
PO-B46 Starfish Small
PO-B48 Starfish 2

2. Ink Pad:
Memento Tuxedo Black (Imagine Crafts)

3. Others:
White and Blue Cardstock
Metallic Crayons (Faber Castell)
Ribbon
Fibers
Laminating Machine and pocket (Purple Cows)
Corner Punch
Hole Punch

How-to:

1. Stamp the Starfish in Black on the blue cardstock.

2. Color the images and background with metallic crayons.

3. Layer panel on white cardstock.

Trim and place laminating pocket to size and run the bookmark through the laminating machine.

Round the corners and punch a hole for the ribbon/fibers.

Add coordinating ribbon and fibers.

4. Not sure if you can see it, but the hot laminating machine will melt the crayon. The lighter the color, the better! Then you'll be able to see the stamped image better.

And I actually used the heat embossing gun before I laminated the bookmark...that's why I got that lavender color around the starfish ('cause I "burned" the paper).